
Black Box
Kali Linux
The Black Box Kali Linux is a Raspberry Pi 5 at its core, built out into a micro Linux desktop.
Designed as a standalone Linux environment using the Kali build for penetration testing it stays physically separate and isolated from everything else on the bench on top of its own virtual environments.
The personal challenge was to build a usable system in the smallest form factor for a portable micro desktop.

AT A GLANCE
Core: Raspberry Pi 5 , 8GB Ram
OS: Kali Linux (Booting from NVMe)
Storage: 1 × 500GB NVMe M.2 (second M.2 slot open)
Cooling: Active cooling fan + Passive aluminum heat sink
Case: Micro enclosure
Power: USB-C 5V

BUILD LIST

Raspberry Pi 5 (8GB Ram)
Crucial P3 500GB PCIe 3.0 NVMe M.2 SSD
Geekworm X1004 V1.1 PCIe dual M.2 HAT
Geekworm P579-V2 peripheral board case
Geekworm H505 Active/passive Cooler
16GB micro SD
Board spacers (not pictured)
GPIO Header extension risers (not pictured)
Micro HDMI- HDMI adapter
USB-C power cord
HOW IT FITS
1. Install the BIOS battery next to the USB-C power input (see image).
1.1. Add 4 risers to the Pi 5. The case included 4 smaller standoffs, attach the risers on the top and the standoffs on the bottom of the board.
1.2. Install the active/passive cooler. The H505 includes thermal pads that sit directly on the SoC and RAM, install the pads directly to the board, NOT the heatsink, to ensure proper alignment.
Plug in the heatsink fan to the Pi 5 board behind the USB ports (see image). Seat the heat sink before anything goes on the GPIO header.
1.3 Install the GPIO extension. The header extension is required to clear the Pi 5’s components.

2. Ribbon in the PCIe. The short FFC cable runs from the Pi 5’s PCIe connector, around the end of the board and up to the X1004’s riser. (NOTE: It’s both directional and delicate, so mind the contact side and don’t force the latch.)
2.1. Stack the HAT. The X1004 sits on top like a normal GPIO HAT using the 40-pin header to passthrough. Press down firmly and secure to the exposed risers using 4 end-cap screws.


3. Mount the SSD. Install the SSD drive at a 45° angle and screw it down. (NOTE: For only a single SSD, place it into the SSD1 slot)
3.1 Install the spare standoff. The second slot stays empty for now but the HAT includes a standoff to secure for future upgrades to an M.2 AI HAT.
4. Slide the now fully assembled unit into the housing. Tuck the bios battery in making sure not to disturb the fan. (Seen above tucked under the ssd)
4.1 Align the bottom case standoffs with the cut holes and add bottom screws.
4.2 Align top cover and secure front screws.

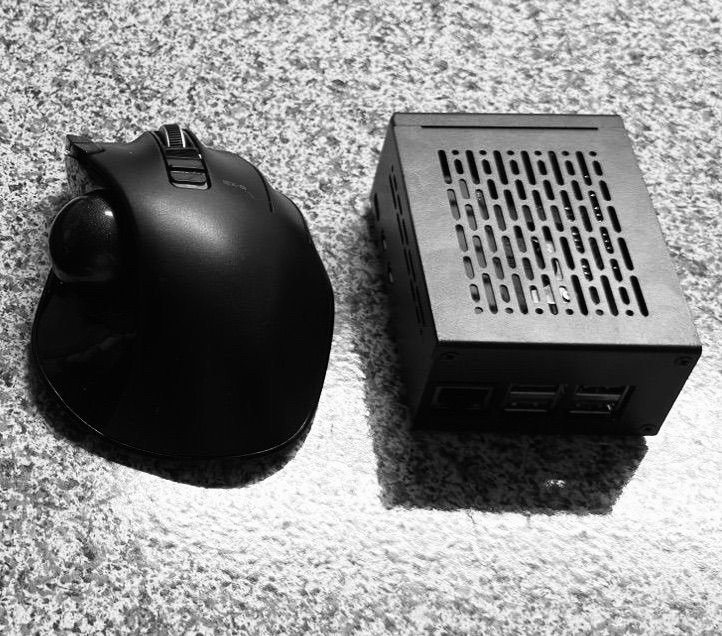
Assembly Complete!
Final physical form: A 3.58in(91mm)L × 2.72in(69mm)W × 1.61in(41mm)H
4 CPU core
8GB Ram
500GB SSD
micro computer.
OS INSTALL

Installing/flashing the OS on the microSD is one of the easiest parts thanks to Raspberry Pi’s own “Raspberry Pi Imager”.
Once downloaded, Select the OS you want to flash to the MicroSD card and follow the prompts to flash. For this build I used the arm64 Kali Linux build available through the Raspberry Pi imager.
Insert the microSD and start the Pi. To migrate the Kali Linux arm64 build over to the SSD we’ll need to use a terminal window.
From the terminal window Confirm the SSD is visible.
Run:
lsblk
You should see:
mmcblk0 (The microSD)
and
nvme0n1 (The SSD).
If nvme0n1 is missing, add
dtparam=pciex1
to
/boot/firmware/config.txt
Reboot, and re-check before going further.
Clone the microSD card to the SSD. Since this is a new SSD well format it to 100% be available. Using a terminal:
sudo dd if=/dev/mmcblk0 of=/dev/nvme0n1 bs=4M conv=fsync status=progresssyncsudo parted /dev/nvme0n1 resizepart 2 100%sudo e2fsck -f /dev/nvme0n1p2sudo resize2fs /dev/nvme0n1p2
next using the Raspberry eeprom config update the boot load order to boot from NVME.
sudo rpi-eeprom-config --edit
Set the line to
BOOT_ORDER=0xf416
save, exit. Restart.
Cold Boot to login= 25.55 seconds
For the initial Login use
USER
Kali
PASSWORD
Kali
